So what you're going to need for this DIY:
- A Shirt, any type of shirt as long as the color will stain it. I recommend using a white button down shirt. In this case, I used my old uniform back when I was in 3rd year of high school.
- Scissors(Optional. I just used scissors to cut the sleeves and the collar of the shirt/s I made.
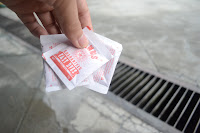
- Dye. Any color of your choice.
- Hot water.
- Basin.
- A rod to push your clothes into the water.

This is how it looks like when I cut out the pockets and sleeves. :)
Next, pour the hot water in the basin and mix in the dye color of your choice.
Mix the water with the dye, stir it using the rod.
Then dip the shirt quarter of the way, almost nearing the bottom, soak the for two minutes. Then move the shirt up and soak it in a longer period of time.
And here's the finish product!
I made two ombre shirts, one in red and one in blue.
I hope you do this guys! It was really fun to do! I'll post a look on it later! XOXO!


Walang komento:
Mag-post ng isang Komento